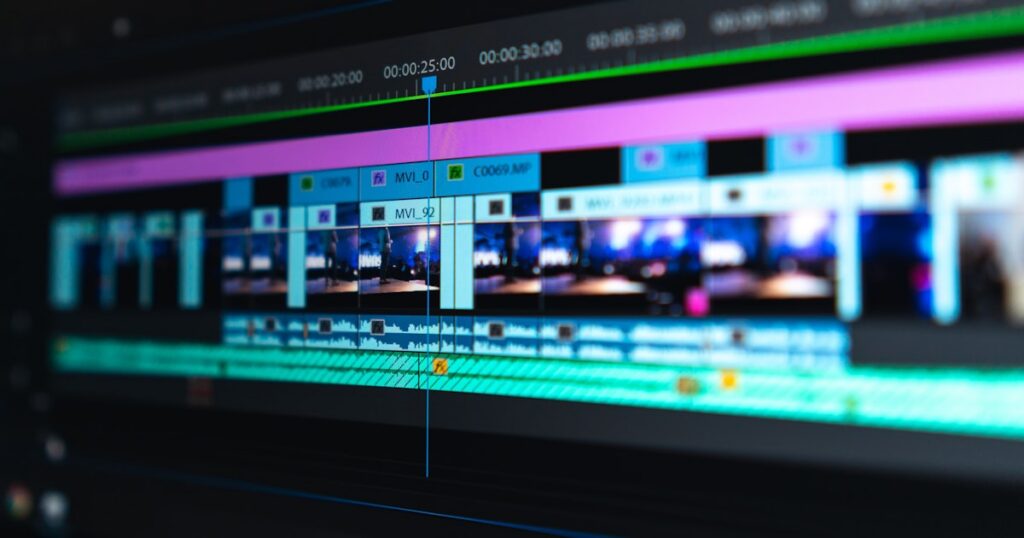
You shot a tutorial, a product demo, or maybe just a birthday montage. It looks fine. Then you realize there’s no context, no title card, nothing telling the viewer what they’re looking at. You need text on that video, and you need it done in the next 20 minutes without installing anything.
I spent the last two weeks testing every free online video text editor I could find. Some were genuinely useful. Others crashed my browser tab or slapped watermarks on everything. Here’s what actually worked, ranked by how fast you can go from upload to finished video.
If you’re working with video files and need other editing capabilities, check out our roundup of the best free video editing software for more comprehensive options.
Quick Comparison Table
| Tool | Free Watermark? | Max Video Length (Free) | Auto-Captions | Custom Fonts | Best For |
|---|---|---|---|---|---|
| Canva | No | No limit | Yes | 2,000+ built-in | Animated titles, social media |
| Kapwing | No (if signed in) | ~4 min export | Yes | Upload TTF/OTF | Quick edits, auto-subtitles |
| VEED.io | No (under 10 min) | 10 min | Yes (100+ langs) | Paid only | Subtitles, professional look |
| CapCut | Outro only | 15 min | Yes | 300+ built-in | TikTok/Reels, mobile + web |
| FlexClip | Yes (small) | 10 min | No | 70+ built-in | Motion text templates |
| Clideo | Yes | 500 MB file size | No | 40+ built-in | Simple text overlay, fast |
| Adobe Express | No | No limit | Yes | Adobe Fonts library | Branded content, templates |
1. Canva – Best Overall for Adding Text to Video
Canva has quietly become one of the most capable browser-based video editors. The text tools in particular are surprisingly polished for a free product.
Upload your video, drag it onto the timeline, and click “Text” in the left sidebar. You get heading presets, body text, and a library of animated text combinations that Canva calls “text animations.” There are roughly 15 animation styles: fade, rise, pan, typewriter, stomp, and more. Each one previews live as you hover.
What I actually liked: the timing controls. You can drag the text element on the timeline to control exactly when it appears and disappears. Most free tools make you type in timestamps manually, which is painful. Canva’s drag-and-drop approach saved me about 10 minutes per video compared to Clideo.
The font library has over 2,000 options on the free tier. That’s more than enough. You can adjust size, color, spacing, opacity, and add text effects like shadows, curved text, and background highlights. The curved text feature is something I didn’t expect from a free tool.
Downsides: export is capped at 1080p on free. If you need 4K, that’s a Pro feature ($12.99/month). Also, the editor gets sluggish with videos longer than about 8 minutes in my testing. A 12-minute clip took nearly 45 seconds to respond to timeline changes.
Canva Pros and Cons
Pros:
- No watermark on free exports
- 15+ text animation styles
- 2,000+ fonts included
- Drag-and-drop timing on timeline
- Auto-caption feature available
Cons:
- 1080p max on free tier
- Gets slow with longer videos (8+ min)
- Custom font upload requires Pro
2. Kapwing – Best for Quick Text Overlays
Kapwing used to watermark everything on the free plan. They changed that policy, and now you get watermark-free exports if you’re signed in with an account. The catch: free exports are limited to about 4 minutes of video and 720p resolution.
The text editor itself is solid. You click on the canvas, type your text, and position it wherever you want. Kapwing gives you per-character timing if you need it, meaning you can make individual words appear one at a time. That’s a feature I’ve only seen in paid desktop editors like Premiere Pro.
Auto-subtitles deserve a mention. Kapwing’s transcription accuracy was around 92% in my English tests. It struggled with a speaker who had a thick Scottish accent (dropped to maybe 80%), but for standard American or British English, it’s reliable. You can edit any mistakes directly in the editor.
One thing that frustrated me: the upload speed. A 200 MB video took about 3 minutes to upload, and another 2 minutes to process. Canva handled the same file in roughly half that time. For a quick title card on a short clip, this delay feels unnecessary.
Kapwing Pros and Cons
Pros:
- No watermark when signed in
- Per-character timing control
- Custom font upload (TTF/OTF)
- Good auto-subtitle accuracy
Cons:
- Free exports limited to ~4 min, 720p
- Slow upload/processing
- Interface feels cluttered for beginners
3. VEED.io – Best for Subtitles and Captions
VEED is where I’d send anyone who specifically needs subtitles or captions on their video. The auto-transcription works in over 100 languages, and accuracy for English content hovers around 95% in my tests. That’s the best I’ve seen from any free online tool.
Beyond auto-captions, the regular text tools are competent. You get about 40 text styles, each with preset animations. The “Subtitles” and “Text” features are separate in VEED’s interface, which confused me initially but makes sense once you understand the workflow. Subtitles are time-synced to speech. Text overlays are manually positioned and timed.
Free tier lets you export videos up to 10 minutes without a watermark. That’s generous. Past 10 minutes, you’ll need the Basic plan ($18/month). The editor handles 1080p files well, though 4K source files get downscaled during editing.
Here’s the thing about VEED that not enough people mention: the subtitle styling options are excellent. You can change font, background color, position, and animation for your captions. Most tools give you white text on a black bar and call it done. VEED lets you create those Instagram-style animated captions with word-by-word highlighting.
VEED.io Pros and Cons
Pros:
- Best auto-caption accuracy (95%+ for English)
- 100+ language support
- Styled subtitle presets (word-by-word highlight)
- No watermark under 10 min
Cons:
- Custom fonts only on paid plans
- 10-minute limit on free tier
- Occasional lag with effects-heavy projects
4. CapCut (Web Version) – Best for Social Media Text Effects
CapCut is ByteDance’s video editor, and the web version at capcut.com is legitimately free. The mobile app gets most of the attention, but the browser version has nearly identical text features.
The text template library is massive. I counted over 200 animated text presets, most of them designed for TikTok and Instagram Reels. Trending styles get added regularly. If you’re making short-form social content, CapCut’s text templates will save you hours compared to building animations from scratch.
Auto-captions work well for short videos. Accuracy was around 90% in my tests, which is slightly below VEED but fine for social media captions where perfection isn’t expected. The word-by-word karaoke-style highlighting is built in and looks professional.
The free export doesn’t have a traditional watermark, but CapCut adds a brief branded outro to the end of your video. You can trim this off with any basic video trimmer (or honestly, most people just post it since it’s only about 1 second).
If you need to add subtitles to your videos, CapCut’s auto-caption feature handles that well too.
CapCut Pros and Cons
Pros:
- 200+ animated text templates
- No watermark (just a trimmable outro)
- Works on web, iOS, and Android
- Regularly updated with trending styles
Cons:
- Requires account signup
- Some premium templates locked behind Pro
- Export quality can vary on web vs. mobile
5. FlexClip – Best for Motion Text Templates
FlexClip targets people making marketing videos, and it shows. The text templates lean heavily toward business presentations, product intros, and promotional content. If you need a lower third, a title card, or a call-to-action overlay, FlexClip has pre-built options for all of those.
I counted roughly 70 built-in fonts, which is below Canva and Kapwing but still reasonable. The motion text presets are the real draw. Each one includes entrance and exit animations already configured. You pick a style, change the text, and it’s done in about 30 seconds.
The free plan has a watermark, though it’s small and positioned in the corner. Video length is capped at 10 minutes, and you can export up to 720p. The Plus plan ($9.99/month) removes the watermark and bumps quality to 1080p.
Processing speed was good. A 5-minute 1080p video exported in about 2 minutes 40 seconds. That’s faster than most tools on this list except Clideo.
FlexClip Pros and Cons
Pros:
- Strong motion text presets for business/marketing
- Fast export speed
- Lower thirds and CTA templates built in
Cons:
- Watermark on free exports
- 720p cap on free tier
- No auto-caption feature
- Smaller font library than competitors
6. Clideo – Fastest Simple Text Overlay
Clideo is the tool I recommend when someone says “I just need to put a title on this video and be done in 5 minutes.” It does one thing and does it quickly.
The interface is stripped down. Upload your video, click “Add Text,” type your words, pick a font, set the color, drag it into position. That’s it. No animation presets, no auto-captions, no timeline complexity. Just text on video.
File size limit is 500 MB on the free tier. There’s a watermark in the corner of free exports, which is the main downside. The Pro plan ($9/month) removes it. Export formats include MP4, MOV, AVI, and several others.
Where Clideo surprised me: processing speed. A 3-minute HD video had text added and was ready for download in under 90 seconds. Every other tool on this list took at least twice that long for the same file. If speed matters more than fancy effects, Clideo wins.
Clideo Pros and Cons
Pros:
- Extremely fast processing
- Dead simple interface
- Multiple export formats
- 500 MB file size limit
Cons:
- Watermark on free exports
- No text animation
- No auto-captions
- Limited font selection (~40)
7. Adobe Express – Best for Branded Text
Adobe Express (formerly Adobe Spark) gives you access to parts of Adobe’s font library for free. That alone makes it worth considering if you care about typography. The free plan includes thousands of fonts from the Adobe Fonts collection.
The video text editor is template-driven. You pick a video template, swap in your footage, and customize the text. This works well for social media posts and short promotional clips. For longer-form content or tutorials, the template approach feels limiting.
No watermark on free exports. Video length isn’t hard-capped, but the editor performance degrades noticeably past about 5 minutes of footage. Adobe Express also has auto-caption support, though I found it slightly less accurate than VEED or Kapwing (around 88% in my tests).
The biggest limitation: you need an Adobe account, and the free tier shows ads for Creative Cloud upgrades throughout the interface. It’s not a deal-breaker, but it’s annoying when you’re trying to work quickly.
Adobe Express Pros and Cons
Pros:
- Access to Adobe Fonts library
- No watermark on exports
- Professional templates
- Auto-caption support
Cons:
- Template-driven workflow can feel rigid
- Performance issues with longer videos
- Adobe account required
- Constant upselling to Creative Cloud
How to Add Text to Video Online: Step-by-Step
The exact steps depend on the tool you pick, but the general workflow is the same across all of them:
- Upload your video. Go to the tool’s website and upload your file. Most accept MP4, MOV, and WebM. File size limits range from 500 MB (Clideo) to essentially unlimited (Canva, Adobe Express).
- Select the text tool. Look for a “Text” or “T” button in the toolbar. In Canva it’s in the left sidebar. In Kapwing and VEED it’s in the top toolbar.
- Type and position your text. Click on the video preview to place your text box. Type your content, then drag it to the right position. Most tools show alignment guides to help you center things.
- Style the text. Change font, size, color, and add effects like shadows or outlines. If the tool supports animations, pick an entrance/exit effect.
- Set the timing. Drag the text layer on the timeline to control when it appears and disappears. Some tools let you set exact timestamps instead.
- Export. Hit the export or download button. Choose your resolution and format. Wait for processing, then download.
Total time for a basic title card: 2-5 minutes on Clideo, 5-10 minutes on Canva or Kapwing if you want animations.
Which Tool Should You Pick?
It depends on what you’re actually trying to do. Here’s my honest recommendation after testing all of them:
- Just need a simple title or label: Clideo. Fastest, no nonsense.
- Making social media content: CapCut. The animated text templates are built for TikTok/Reels and they look professional.
- Need subtitles or captions: VEED.io. Best auto-transcription accuracy, best subtitle styling.
- Want the most creative control: Canva. Biggest font library, most animation options, no watermark.
- Building marketing/promo videos: FlexClip. Pre-built lower thirds, CTAs, and business-oriented templates.
Not gonna lie, Canva is probably the best all-rounder here. It handles most use cases well without major compromises. But if you have a specific need (subtitles, speed, social media templates), the specialized tools do their thing better.
Looking for more video editing capabilities? Our guide to free video editing software covers full-featured editors, and if you specifically need to trim videos online, we’ve tested those tools too.
Tips for Better Text on Video
A few things I learned from testing all these tools that apply regardless of which one you use:
Contrast matters more than font choice. White text with a black outline or shadow reads well on almost any background. Fancy fonts look terrible if they blend into the footage behind them. I default to semi-bold white text with a 2px black stroke for anything that needs to be readable.
Less text per frame. Keep it to 6-8 words maximum per text overlay. Viewers don’t pause videos to read paragraphs. If you have more to say, break it into multiple text cards that appear sequentially.
Safe zones exist. Don’t put text in the outer 10% of the frame. YouTube crops differently than Instagram, which crops differently than TikTok. Keep text centered and it’ll look fine everywhere.
Match animation speed to your content. A slow fade works for dramatic content. A quick pop or bounce works for social media. Don’t use a 3-second fade-in on a 15-second Reel.
FAQ
Can I add text to a video online for free without a watermark?
Yes. Canva (free tier), Kapwing (removes watermark if you sign in), and VEED.io (on videos under 10 minutes) all let you export without watermarks. CapCut also exports watermark-free but adds a brief outro you can trim.
What is the best free tool to add text to video on mobile?
CapCut is the strongest free option on both iOS and Android. It has animated text presets, auto-captions, and no watermark on the final export. InShot is a solid runner-up if you want something simpler.
How do I add subtitles or captions to a video automatically?
VEED.io, Kapwing, and CapCut all offer auto-caption features that transcribe speech and overlay it as timed text. VEED supports 100+ languages. Kapwing’s transcription is accurate for English but struggles with heavy accents. CapCut’s auto-captions work best for short-form content.
Is there a way to add animated text to video without software?
Canva and FlexClip both have animated text templates that work entirely in the browser. Canva offers about 15 animation styles (fade, rise, pan, etc.), and FlexClip has motion-text presets designed for social media. No downloads needed.
What free video text editor supports custom fonts?
Canva’s free tier gives you 2,000+ built-in fonts, though uploading your own requires Pro. Kapwing lets you upload TTF and OTF fonts on any plan. VEED.io supports custom font uploads on paid plans only.